前言
在 Mobile App 的開發中,推播通知已經是不可或缺的 App 功能之一,大部分的商業 APP 都一定有推播通知的功能,因此,這次要介紹如何安裝與使用 Phonegap Plugin Push 並透過 Azure Notification Hub 實現 Android 與 iOS 的即時推播訊息功能。
什麼是 Phonegap-plugin-push?
Phonegap-plugin-push 提供使用單一獨立的 API 來支援接收及處理原生 push notification。但這不是指我們可以發送單一個訊息並在不同作業系統上都能收到。基本上 Android 使用的是 FCM,iOS 則使用 APNS,而且他們的 payload 都很不一樣。即使在 Android 及 iOS 都使用 FCM,也是需要提供不同的 payload 才能使套件正常運作。對 Android 來說,每一次的推播內容都會在 payload 存放 data 的物件,可以參考 Notification vs Data Payload 這篇文章。iOS 的話可以依照 FCM documentation。
筆者主要是透過 Azure Notification Hub 發送推播訊息, Azure Notification Hub 同時提供了方便管理的介面,讓我們只需要透過一個通知中樞,並根據不同的平台提供不同的 payload 即可輕鬆的實現推播訊息通知的功能!
安裝需求
在安裝之前需要檢查一下對應的 Cordova 所支援的版本,若選擇的版本是較舊的 Cordova-Android 6.0.0 與 Cordova-iOS 4.3,則需要留意套件的版本要裝 1.9.0 的。
| Plugin version | Cordova CLI | Cordova Android | Cordova iOS | CocoaPods |
|---|---|---|---|---|
| 2.0.0 | 7.0.0 | 6.2.1 | 4.4.0 | 1.1.1 |
| 1.9.0 | 6.4.0 | 6.0.0 | 4.3.0 | 1.1.1 |
| 1.8.0 | 3.6.3 | 4.0.0 | 4.1.0 | N/A |
指令安裝
透過指令工具進行安裝:
$ cordova plugin add phonegap-plugin-push
安裝完成後可以看到 config.xml 出現如下的內容:
<plugin name="phonegap-plugin-push" spec="^2.1.2" />
建立 Azure 通知中樞
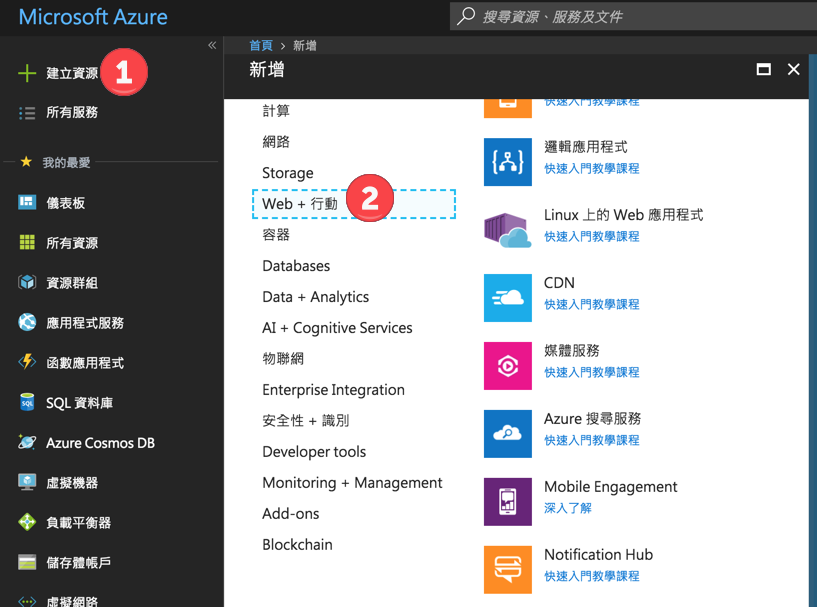
首先點選左上角建立資源,選擇 Web + 行動 的類別,可以看到 Notification Hub:
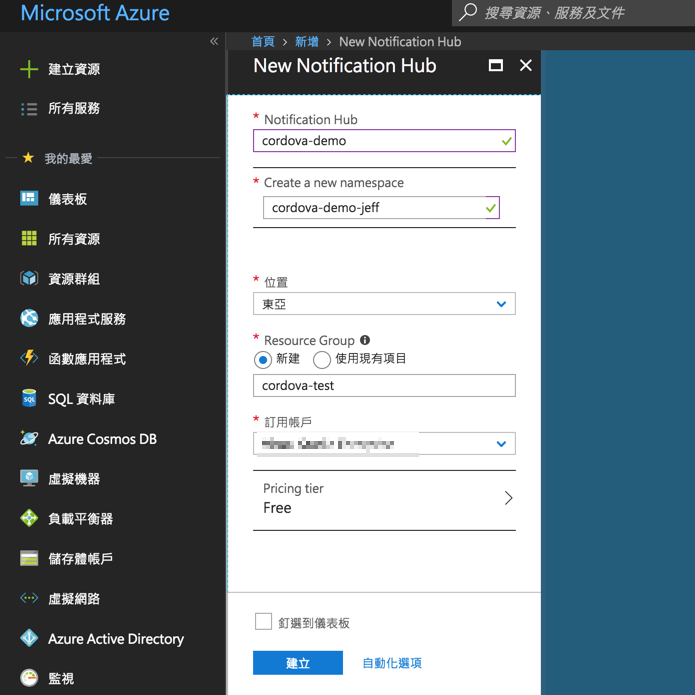
輸入 Notification Hub 相關資料,完成後點擊建立按鈕:
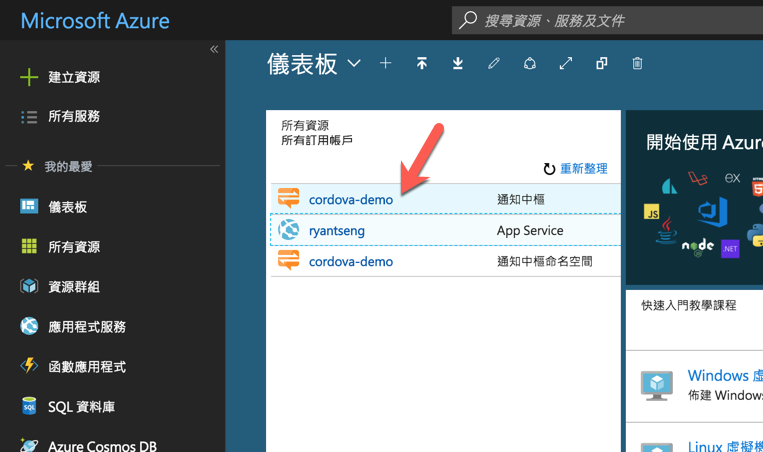
回到儀表板,可以看到剛建立好的通知中樞:
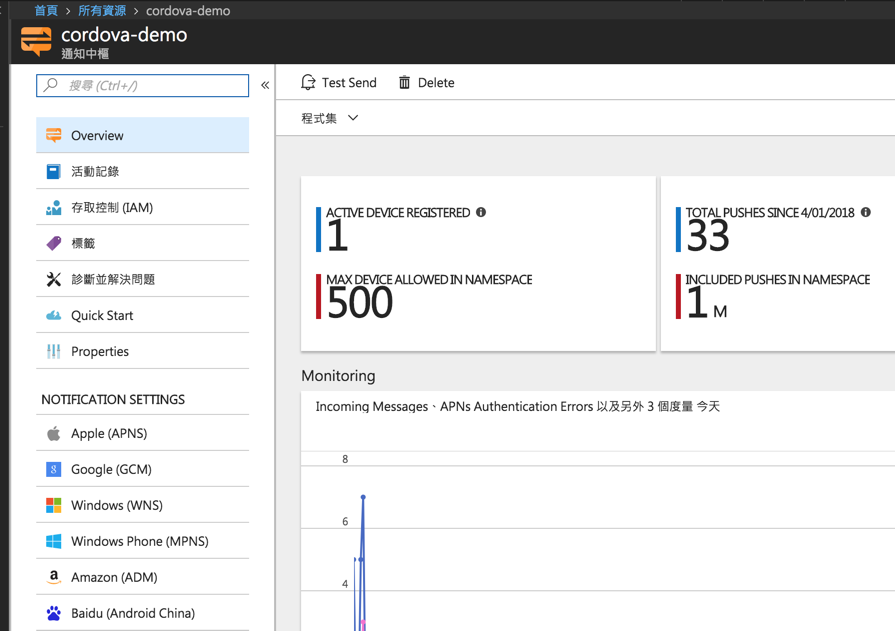
點擊通知中樞可以看到詳細資訊:
實作 Cordova App 接收推播通知功能
- Sample Code
- Initialize PushNotification
- WebAPI Post platform info and device token
初始化設定
  initNotification() {
    const senderID = environment.senderId;
    const pushConfig: PhonegapPluginPush.InitOptions = {
      android: {
        senderID: senderID
      },
      ios: { alert: true, badge: true, sound: true }
    };

    this.pushNotification = PushNotification.init(pushConfig);

    // 進行註冊
    this.pushNotification.on('registration', data => {
      // Get the native platform of the device.
      const platform = device.platform;
      // Get the handle returned during registration.
      const registId = data.registrationId;
      // Set the device-specific message template.
      if (platform === 'android' || platform === 'Android') {
        // Register for GCM notifications.
        this.handleData = { Platform: 'gcm', DeviceToken: registId };
      } else if (device.platform === 'iOS') {
        // Register for notifications.
        this.handleData = { Platform: 'apns', DeviceToken: registId };
      }
      console.log(`取得 token`, data.registrationId);
    });

    // 收到訊息時
    this.pushNotification.on('notification', data => {
      console.log(`got notification!`, data);
      // data.message,
      // data.title,
      // data.count,
      // data.sound,
      // data.image,
      // data.additionalData
    });

    // 發生錯誤時
    this.pushNotification.on('error', e => {
      console.log(`Notification Error: ${e.message}`, e);
    });
  }
註冊裝置
registDevice(): Observable<any> {
    // console.log(`進行推播註冊`, environment.serverUrl);
    // console.log(`device token`, this.handleData.DeviceToken);
    // console.log(`platform`, this.handleData.Platform);
    return this.http
      .post<any>(
        environment.apiUrl,
        this.handleData,
      )
      .pipe(
        catchError(err => {
          console.log(`notificationService registDevice error`, err);
          return Observable.throw(err);
        })
      );
  }
Android 平台設定
建立 FCM Project
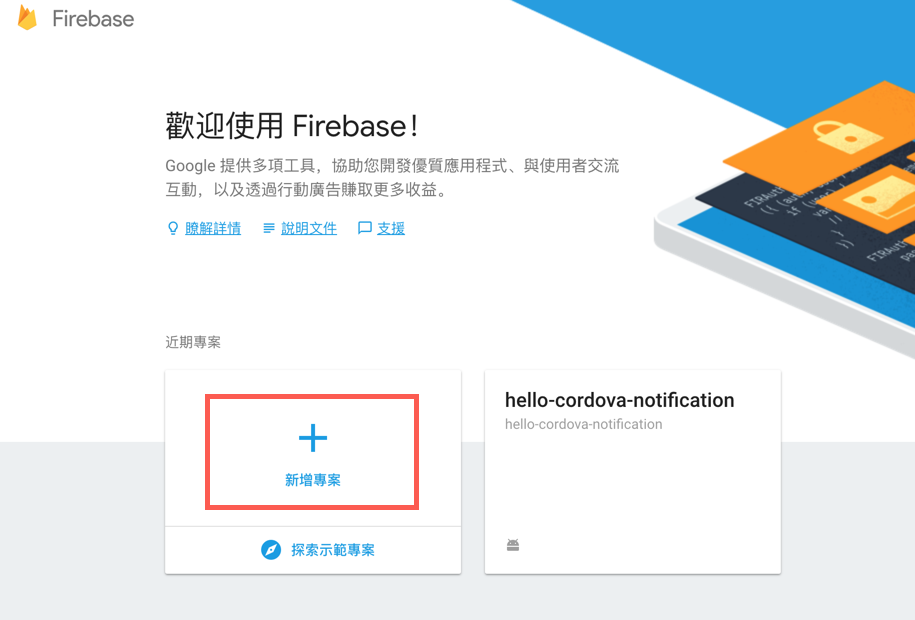
要推播訊息到 Android 系統,需要先建立 FCM ( Firebase Cloud Message ) 專案,登入 Google 帳號後可以看到以下的畫面,點選新增專案:
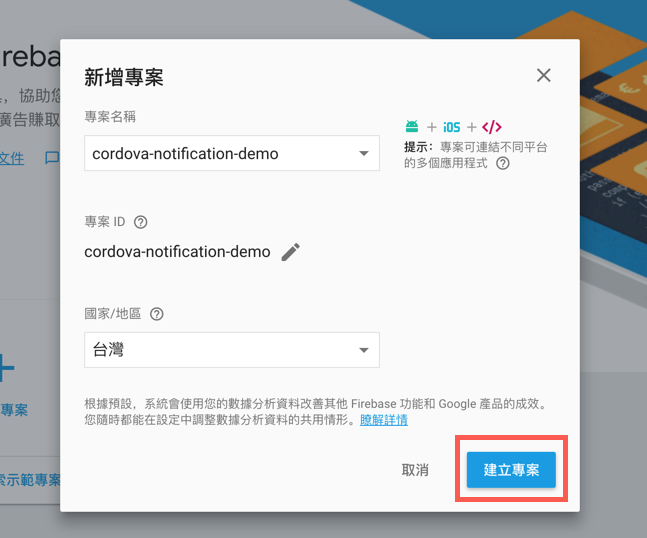
然後輸入專案相關資訊:專案名稱、ID 及國家或地區,並點擊建立專案。
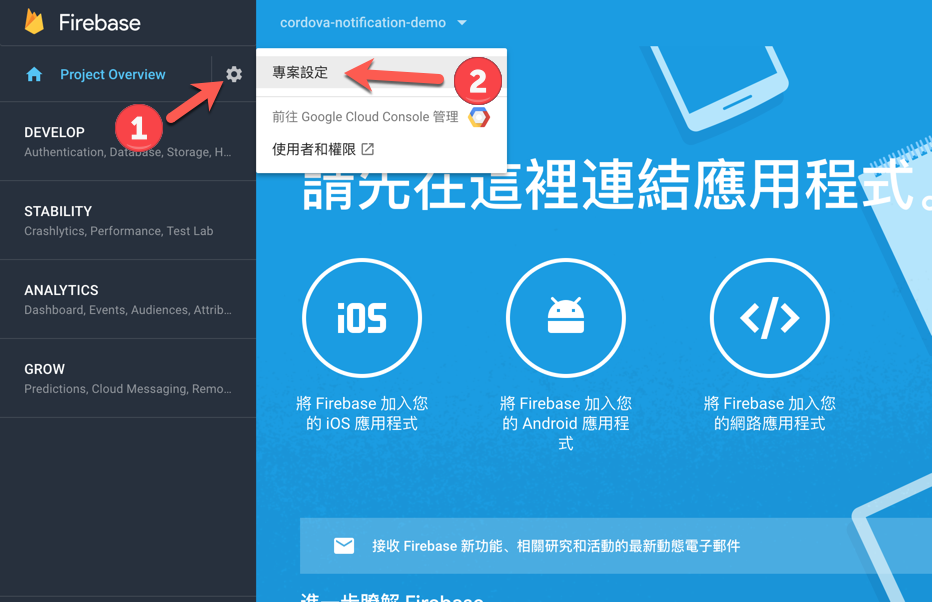
專案建立完成後,會進到專案的 dash board,點選左上角的齒輪展開選單,點擊專案設定:
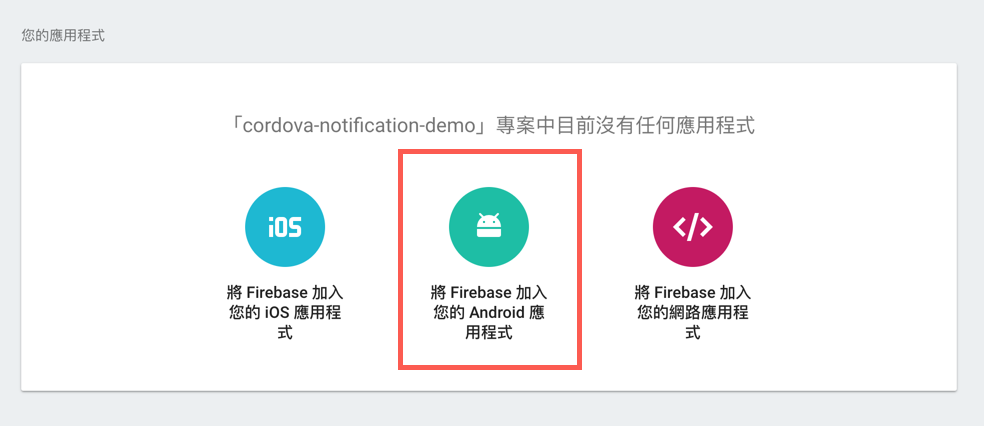
點選後會看到專案的相關資訊,捲軸滾到下方可以看到目前專案中沒有任何應用程式,點擊中間將 Firebase 加入您的 Android 應用程式的選項:
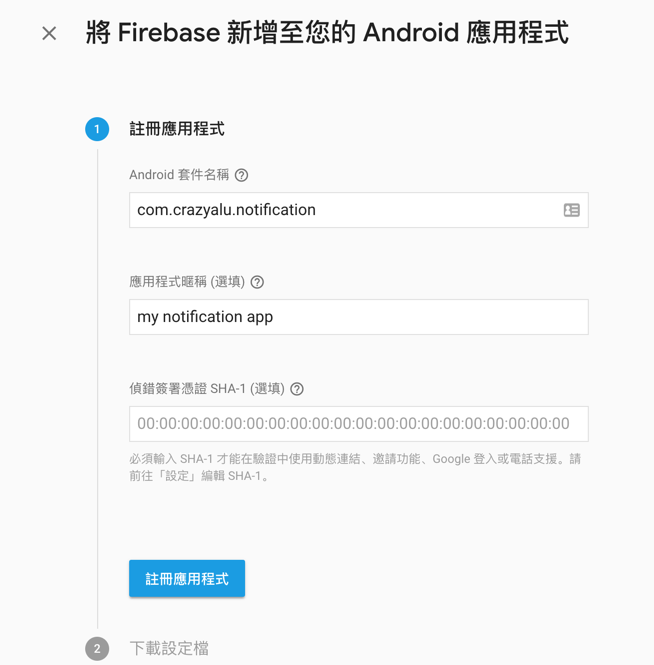
點擊後進入新增 Android 應用程式的畫面,輸入 App 相關資訊,輸入完成後點擊註冊應用程式:
註冊完成之後,點選 下載 google-services.json` 按鈕進行下載,並將檔案存放在 Cordova 專案的根目錄。
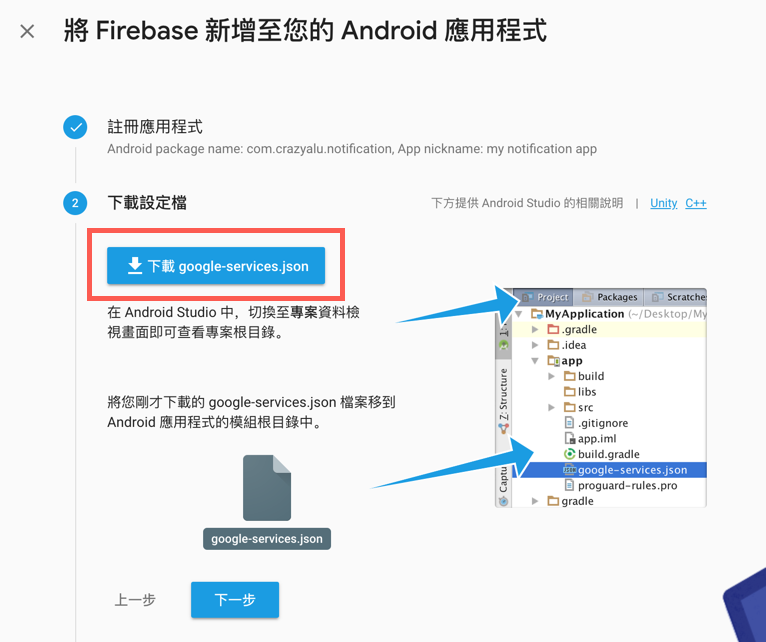
下載完成之後再回到 Cordova 專案的 config.xml 設定檔,在 Android 的 platform 區塊中加上以下的內容:
 <platform name="android">
        <allow-intent href="market:*" />
        <resource-file src="google-services.json" target="app/google-services.json" />
</platform>
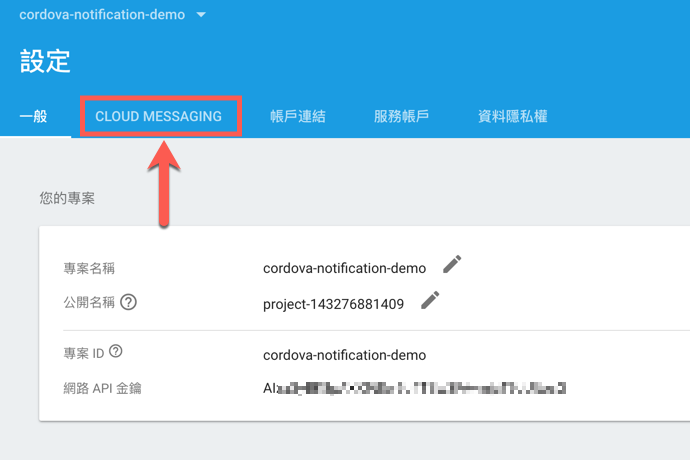
FCM 的部分設定完成後,我們還需要將 API Key 存放至 Azure Notification Hub 的設定中,因此回到專案的主控台,雖然在一般的分頁下可以看到 網路 API 金鑰,但這似乎還是舊版的,筆者在 Azure 輸入設定時會遇到錯誤的情況,因此新版的部分要點選 CLOUD MESSAGING 標籤進入:
會看到專案憑證的資訊及寄件者 ID,而伺服器金鑰則是建立 Azure Notification Hub 之後要設定的 API Key:

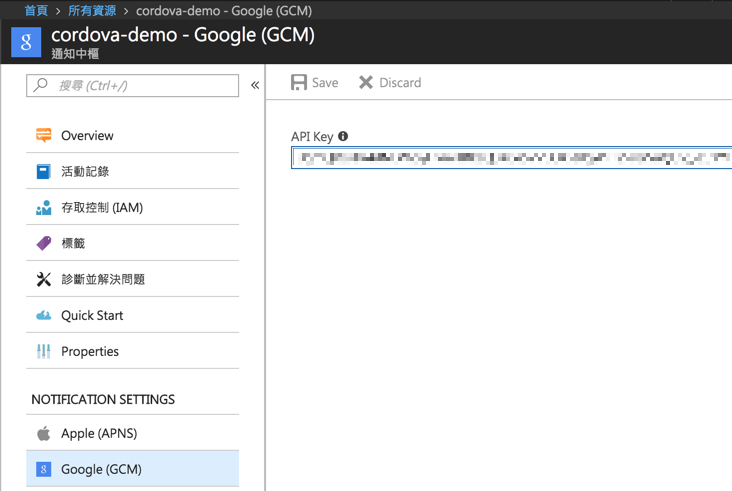
進入 Googel ( GCM ) 的設定,並將複製的 API Key 貼上:
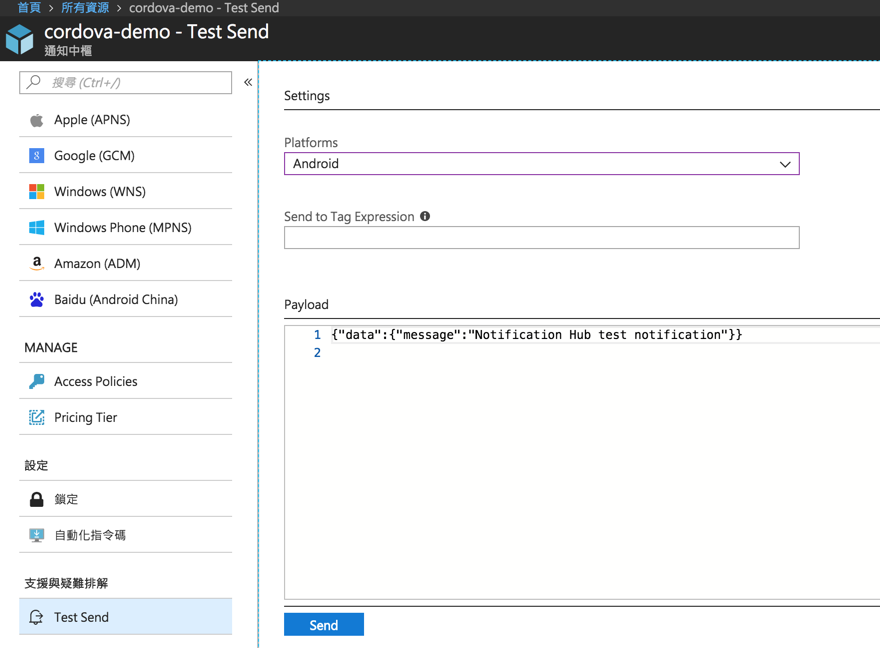
Azure Notification Hub 測試推播
完成設定之後,可以到側欄下方有個支援與疑難排解的類別,底下有個 Test Send 連結,點選後會看到測試發送的畫面,確認 Cordova App 的 Device Token 有順利註冊成功後,選擇 Android 平台即可立即發送測試。
小結
經過以上的介紹我們可以知道要如何安裝 phonegap-plugin-push 並建立 FCM Project 後,將 google-service.json 加入 Cordova 專案中,同時將伺服器金鑰設定至 Azure Notification Hub 中,最後來一發測試訊息,大功告成!
Apple 的部分,由於需要另外建立推播服務的憑證,下篇文章會再針對 APNS 的部分去做說明,若沒接觸過 Apple Develope 後台,想實作推播功能的話,需要花點時間了解 Apple 的 App Identity 與憑證的建立方式,才能順利實作囉。