前言
繼上次玩了一下 SSR Hydration 之後,這次直接體驗用 Firebase 來發布 Angular SSR 的應用,並把過程記錄下來。這次的實驗是使用 Firebase 的 Functions 來部屬 SSR 應用,以及使用 Firebase Hosting 來部屬靜態檔案。概念上就是 Hosting 的首頁直接導向 Server 的 API 來取得 SSR 的 HTML 字串,然後 Client 端再進行 Hydration 以此初始化 Angular 應用。
先看 Lighthouse 測一下跑分的結果: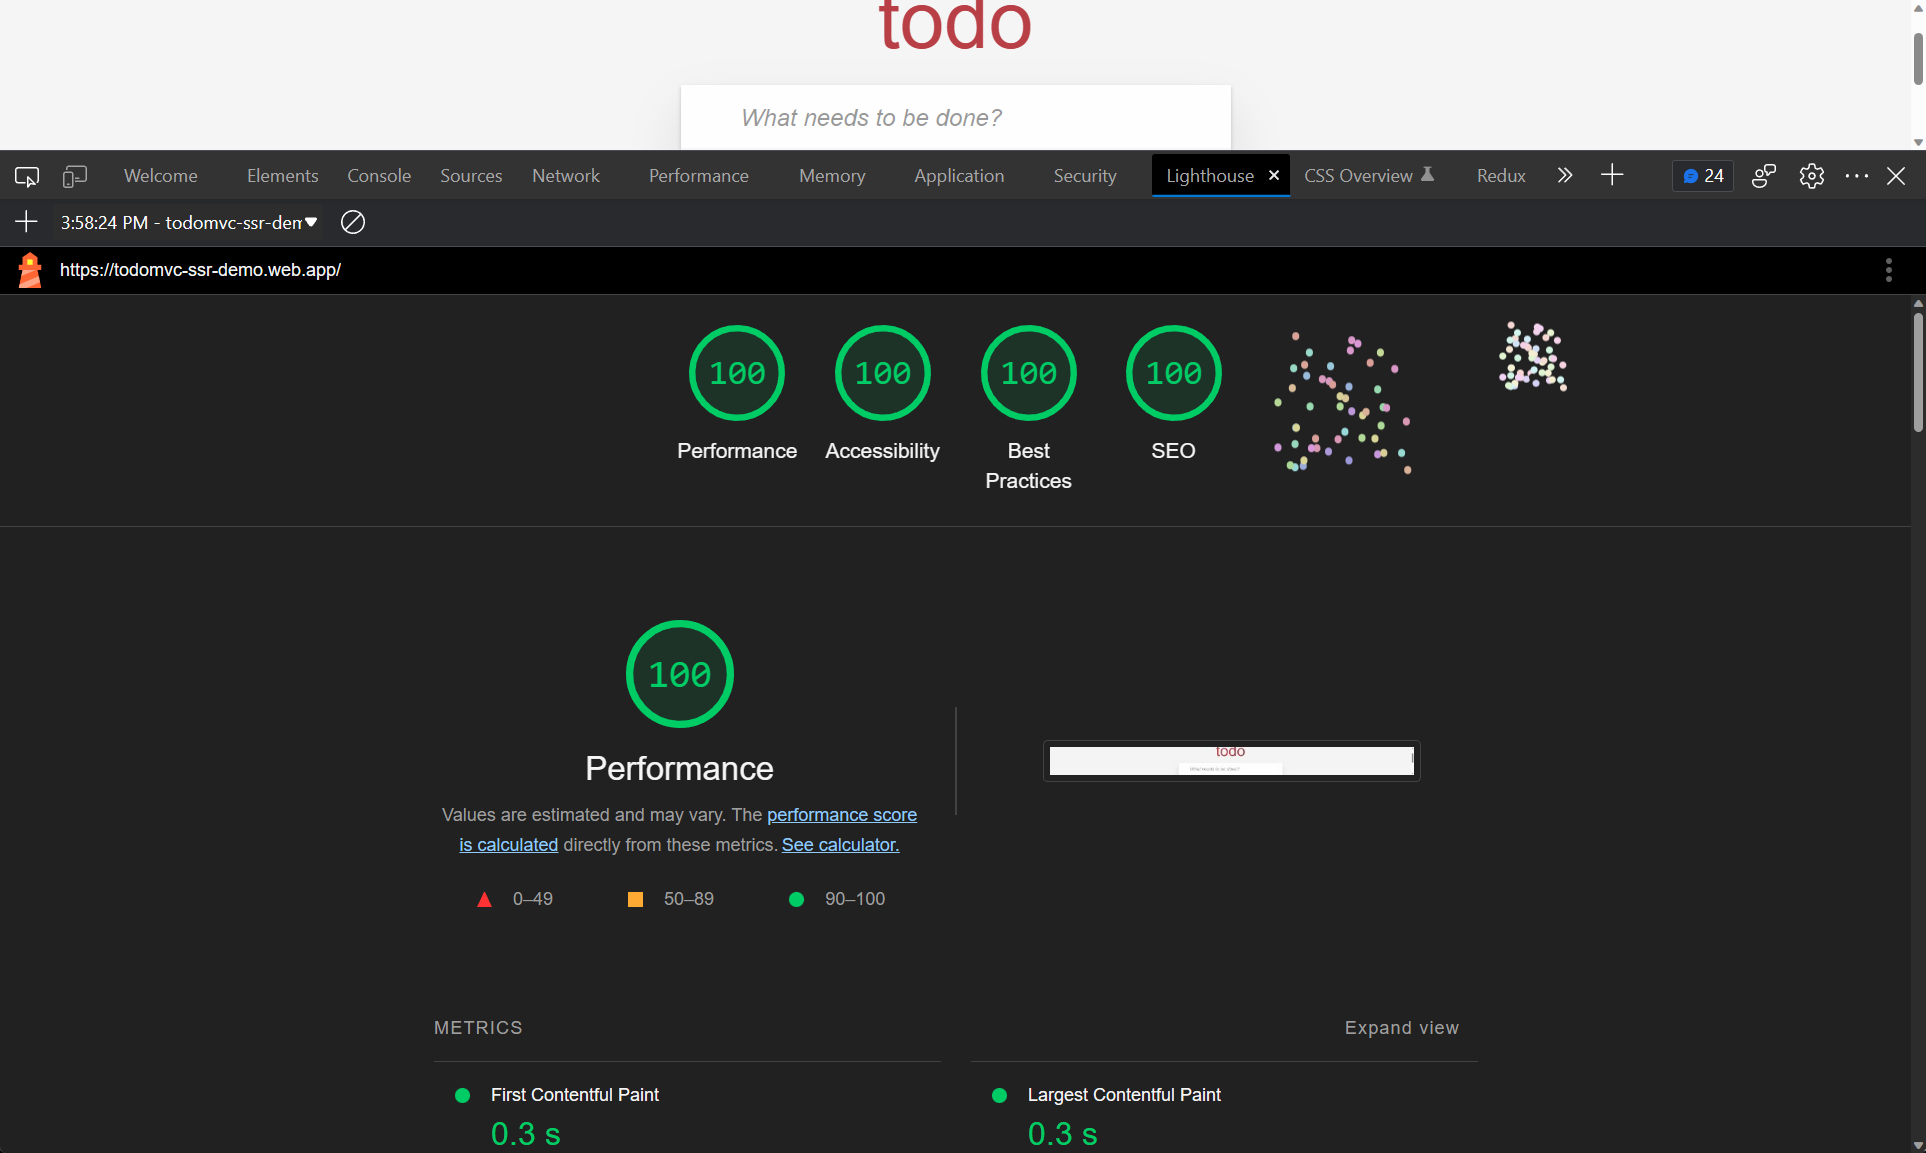
Ng build 之前的準備
我直接基於之前的 TodoMVC2023 專案來實驗,在執行指令之前,我們需要做一下檔案的調整。
修改 angular.json 的 build outputPath
把 angular.json 中的 build 與 server 的 outputPath 調整一下,將打包出來的檔案放在 dist/functions 目錄下。
 "architect": {
        "build": {
          "builder": "@angular-devkit/build-angular:browser",
          "options": {
            "outputPath": "dist/functions/browser",
          ...
          ...
          "server": {
          "builder": "@angular-devkit/build-angular:server",
          "options": {
            "outputPath": "dist/functions/server",
          ...
        },
修改 server.ts
由於 Angular CLI 自動產生的 server.ts 裡面也有 distFolder 的配置,所以也要跟著調整:
const isDev = isDevMode(); // Don't forget to import isDevMode from @angular/core
const website = isDev ? 'dist/functions/browser' : 'browser';
const distFolder = join(process.cwd(), website);
執行 build:ssr 指令:
npm run build:ssr
Build 完之後可以看到 dist 目錄下有 function/server 以及 function/browser 的資料夾,稍微確認一下有沒有正常出現。
安裝 Firebase Tools CLI
首先要先安裝 Firebase Tools CLI,這個工具可以讓我們在本機端進行 Firebase 操作指令,安裝方式如下:
npm install -g firebase-tools
安裝完成後可以透過 firebase --version 來確認是否安裝成功。
登入 Firebase CLI
接著要進行登入,輸入 firebase login 指令,會跳出瀏覽器視窗,請登入 Google 帳號,登入完成後,就可以在 CLI 看到登入成功的訊息。另外它會問你是否要讓它收集資料以改善服務,這邊就看個人意願了。
初始化 Firebase
Project Setup
登入之後,就可以進行初始化,輸入 firebase init 指令,會跳出選單,我是選擇 Hosting: Configure files for Firebase Hosting and (optionally) set up GitHub Action deploys 以及 Functions: Configure a Cloud Functions directory and its files,接著會問你要使用哪個專案,可以選擇建立新的專案或是選擇既有的專案。
? Please select an option: Create a new project
i  If you want to create a project in a Google Cloud organization or folder, please use "firebase projects:create" instead, and return to this command when you\'ve created the project.

? Please specify a unique project id (warning: cannot be modified afterward) [6-30 characters]:
 todomvc-ssr-demo
? What would you like to call your project? (defaults to your project ID)
✔ Creating Google Cloud Platform project
✔ Adding Firebase resources to Google Cloud Platform project

=== Your Firebase project is ready! ===

Project information:
   - Project ID: todomvc-ssr-demo
   - Project Name: todomvc-ssr-demo
Hosting Setup
接著是 Hosting 相關的設定,主要會詢問你要部屬到哪個資料夾,以及是否要使用 SPA 模式:
? What do you want to use as your public directory? functions
? Configure as a single-page app (rewrite all urls to /index.html)? Yes
? Set up automatic builds and deploys with GitHub? No
+  Wrote public/index.html
Function Setup
設置 Functions 的部分,會有幾個提問,我們選擇 JavaScript,然後會問你要不要使用 ESLint,這邊我選擇 No,最後會問你要不要安裝相依套件,這邊我選擇 Yes。
? What language would you like to use to write Cloud Functions? JavaScript
? Do you want to use ESLint to catch probable bugs and enforce style? No
+  Wrote functions/package.json
+  Wrote functions/.gitignore
+  Wrote functions/index.js
? Do you want to install dependencies with npm now? Yes
functions/index.js 加入 ngssr API
初始化完成之後,刪除 functions/index.html,並且在 functions/index.js 這個檔案新增 API: ngssr:
const functions = require("firebase-functions");
const mainjsfile = require(__dirname + '/server/main' );
exports.ngssr = functions.https.onRequest(mainjsfile.app());
調整 firebase.json
新增 ngssr API 之後,要修改 firebase.json 裡面的 rewrites,讓它可以正確的導向到 ngssr API:
注意: 預設的
rewrites是destination,這邊要改成function。
"rewrites": [
      {
        "source": "**",
        "function": "ngssr"
      }
    ]
執行本地端測試
使用 firebase emulators:start 來啟動本地端的測試環境,這邊會需要一些時間,因為它會幫你安裝相依套件,並且啟動本地端的測試環境。
firebase emulators:start
都沒有報錯的話,就可以在瀏覽器輸入 http://localhost:5000 來看到 SSR 的畫面了。
發布到 Firebase
都確認沒問題之後,就發佈到 Firebase 吧,輸入 firebase deploy 指令,就可以看到部屬的結果了。
firebase deploy
注意: 如果是新的 Firebase Project,預設是免費的 Plan: Spark,可能需要轉成付費的 Blaze Plan 才能部屬成功。
部屬的網址應該是 YOUR_PROJECT_NAME.web.app,deploy 成功後也會出現提示:
+  Deploy complete!

Project Console: https://console.firebase.google.com/project/YOUR_PROJECT_NAME/overview
Hosting URL: https://YOUR_PROJECT_NAME.web.app
驗證結果
首先看一下 Network 第一時間拿到的 HTML: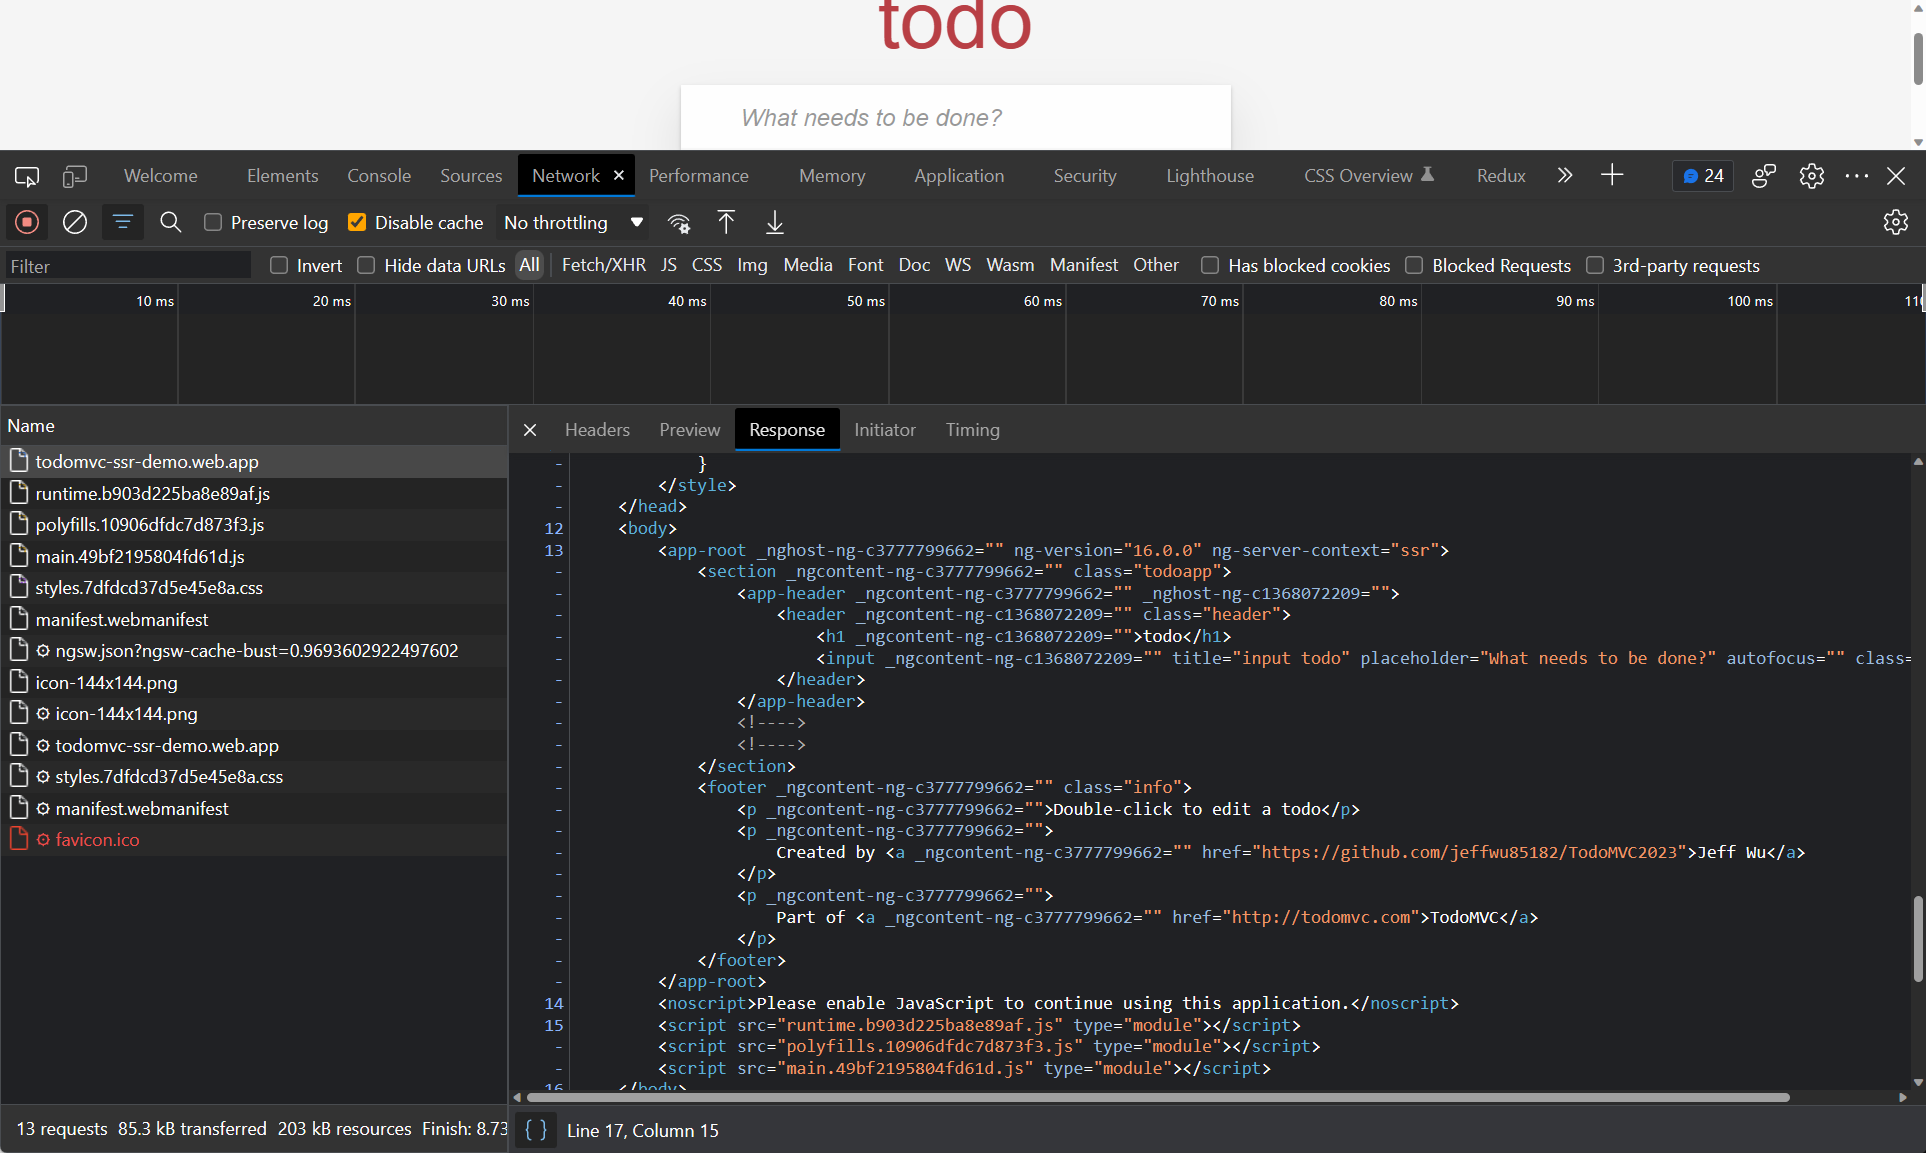
使用 Dev Tool 的 Performance 錄製:
結論
儘管 Angular 配置 SSR 已經相對簡單了許多,不過要搭配什麼樣的 Server 具體還是要根據每個專案的需求去個別調整。這次的實驗是使用 Firebase Functions 來部屬 SSR 應用。另外,雖然升級 Blaze 付費方案後 Firebase Functions 還是有提供免費額度,但超過的話就要付費了,所以如果是大量使用 SSR 的話,還是要考慮一下成本的問題。另外還要注意 .gitignore 的設定,因為這個實驗是直接把 Firebase 專案放到 dist 目錄下,是沒有進版控的。如果要進版控的話,要把 dist 目錄下的 functions 資料夾加入到 .gitignore 中,避免把 node_modules 也一起上版控。
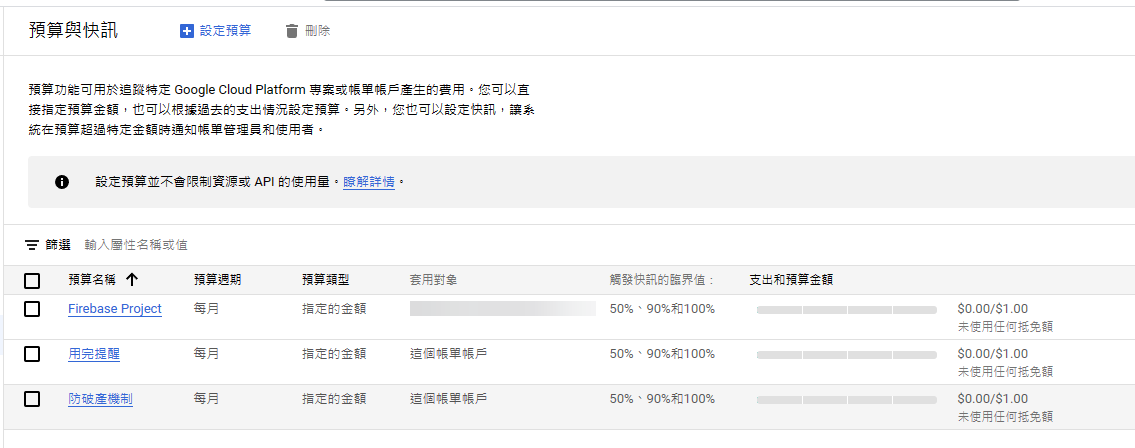
!!!注意: 如果你只是嘗試玩一下的話,保險起見還是要到 GCP 帳戶設定一下預算,避免超支。!!!
參考資料與範例
TodoMVC2023
Angular SSR with Universal and firebase
Angular Universal SSR with Firebase